3 Admin
Guides for admins managing the data catalog.
Giving User Permissions
Users have roles in each organization that give them different permissions.
The roles are:
- Member: can see private datasets in the organization
- Editor: can add private datasets to the organization and delete datasets from the organization
- Admin: can change users’ roles in an organization and publish datasets from private to public
To give a user a role in an organization:
Click on the Organizations tab at the top of the screen and click on the organization you want to add the user to.
Click on the Manage button in the upper right.
Click on the Members tab at the top.
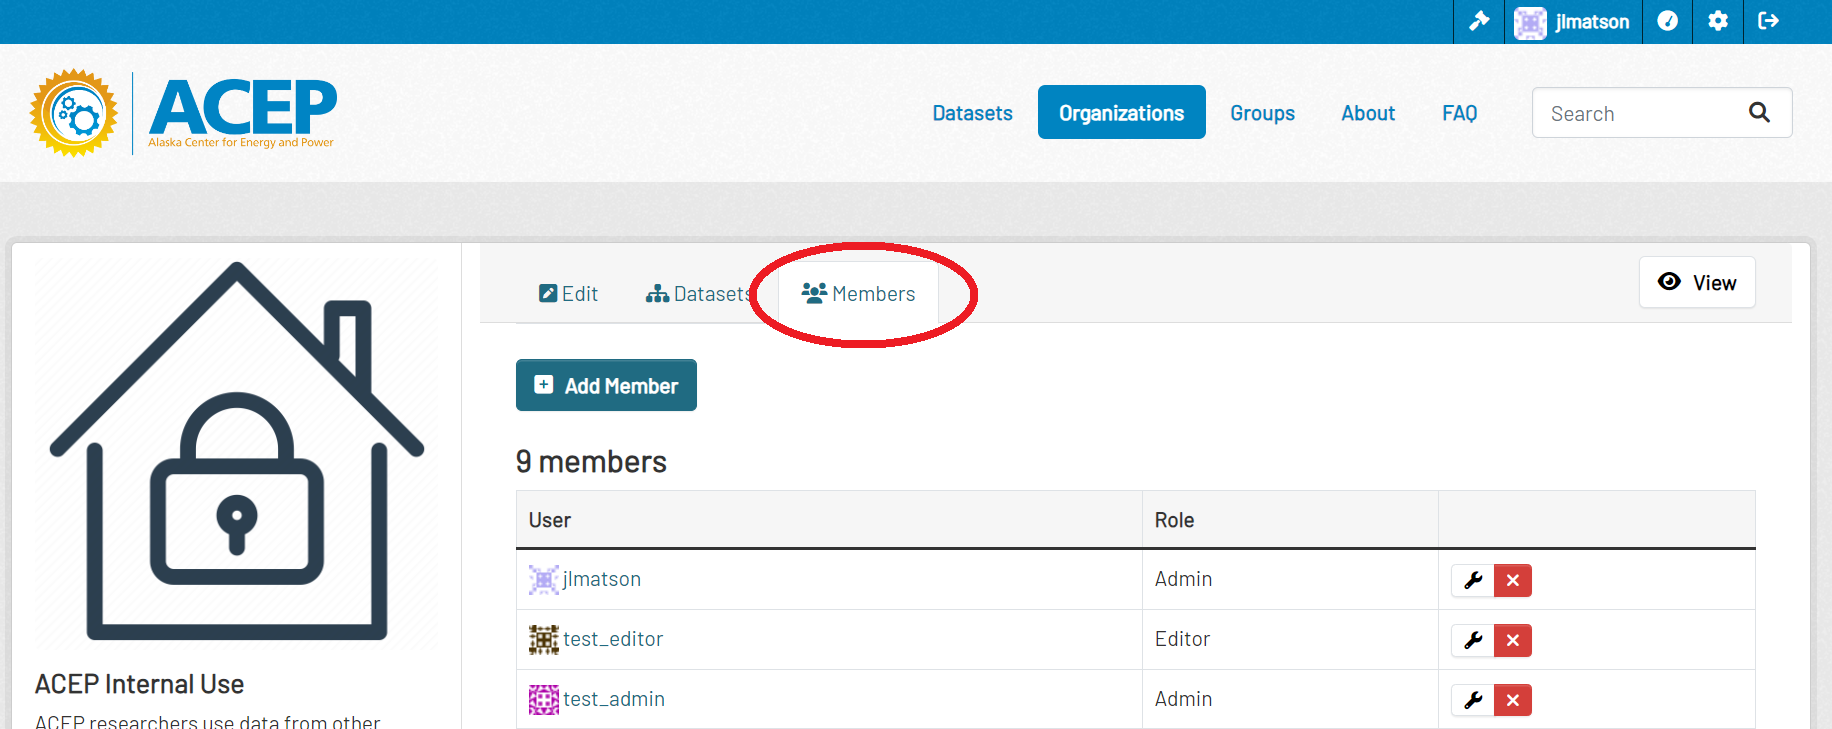
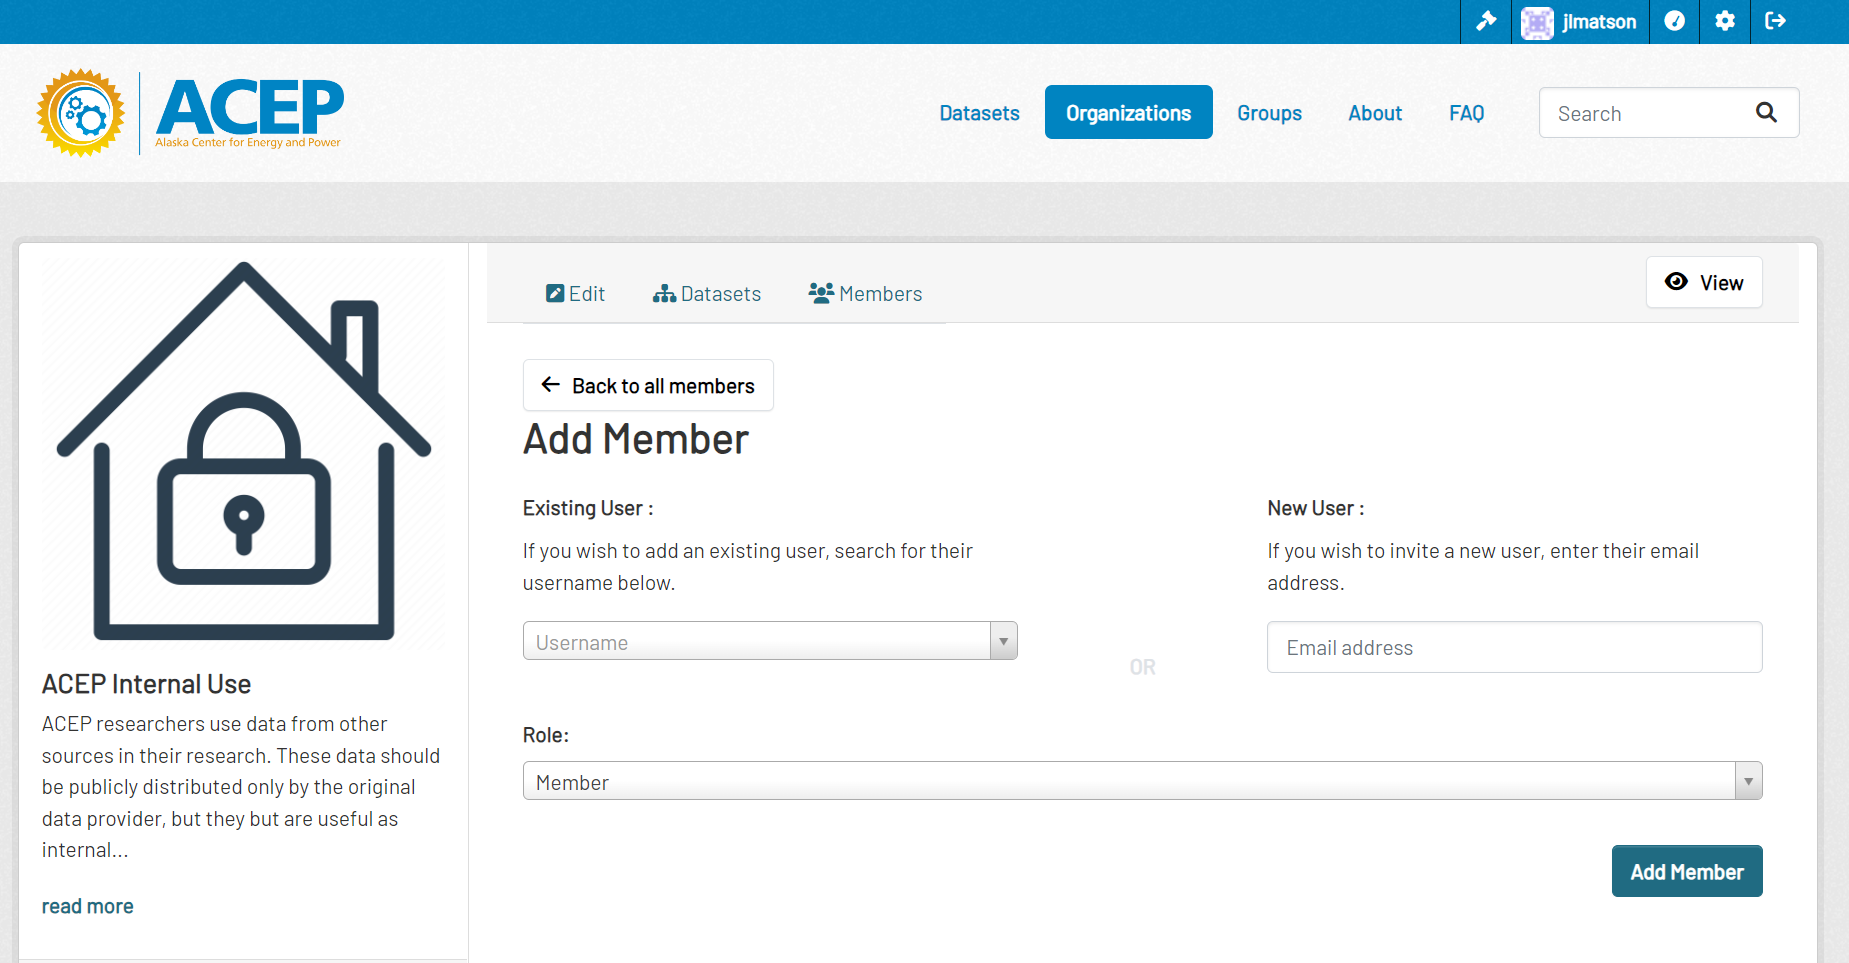
To add a new member to the organizaton, click the Add Member button. Enter their username, select their new role from the dropdown, and click the Add Member button at the bottom of the form.
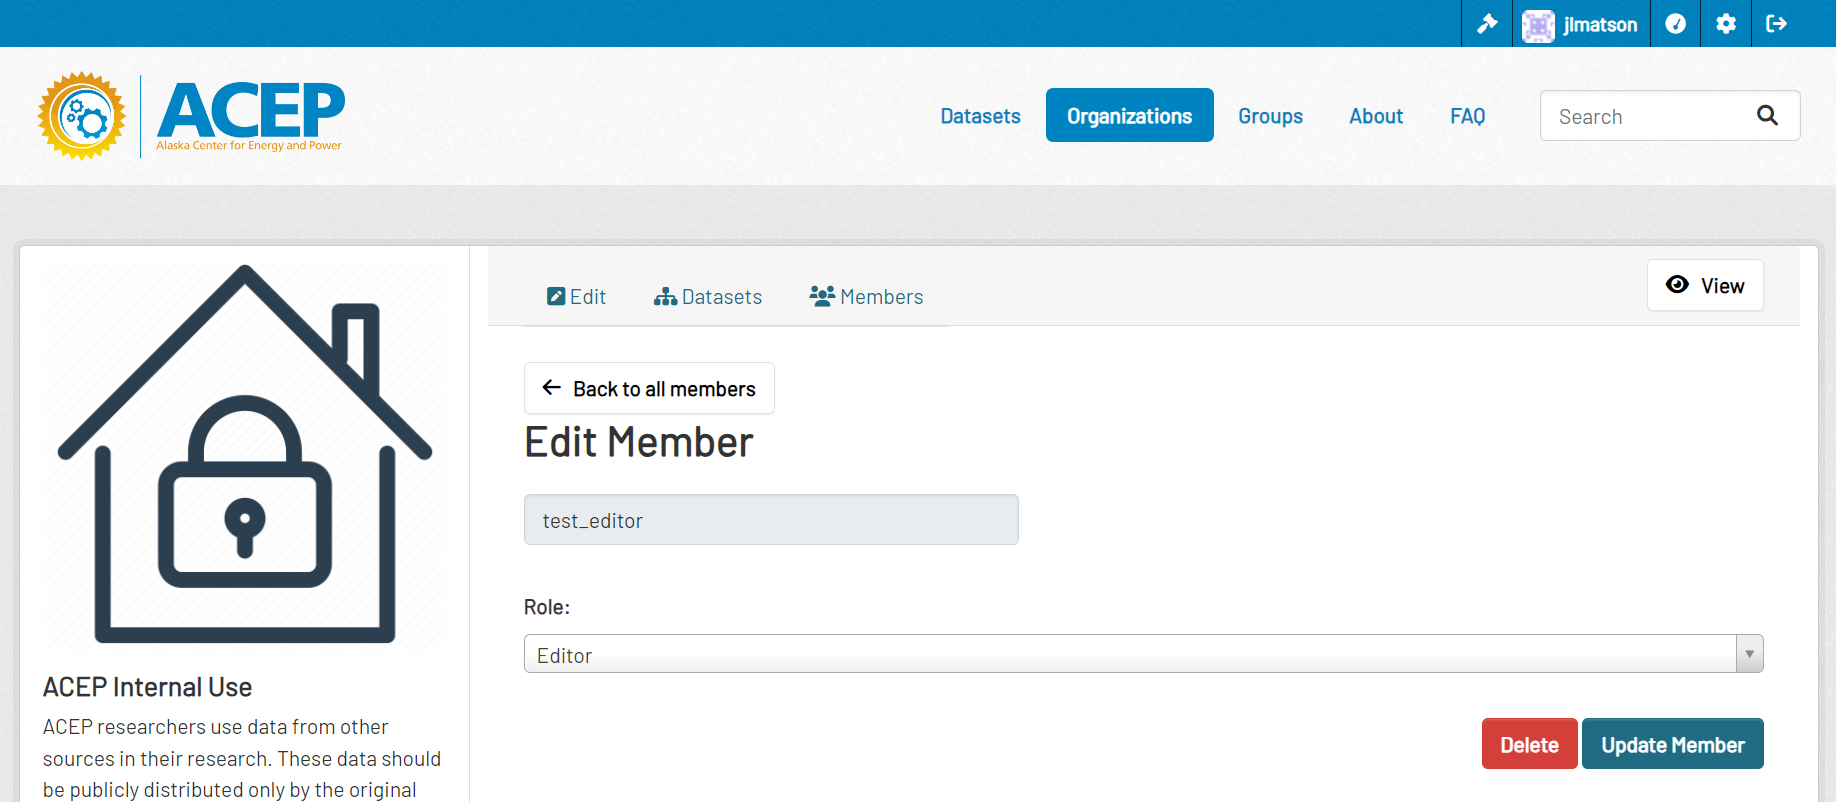
To change an existing member’s role, click the wrench next to their user name.

- Select their new role from the dropdown menu and click Update Member
- To remove the user from the organization completely, click the Delete button.
- Select their new role from the dropdown menu and click Update Member
Reviewing and Publishing a Dataset
- Navigate to the dataset you would like to publish.
- Review the metadata and ensure the files/links are correct and function properly.
- To publish, click on the Manage button in the top right of the dataset page.
- In the metadata fields, find the Visibility field.
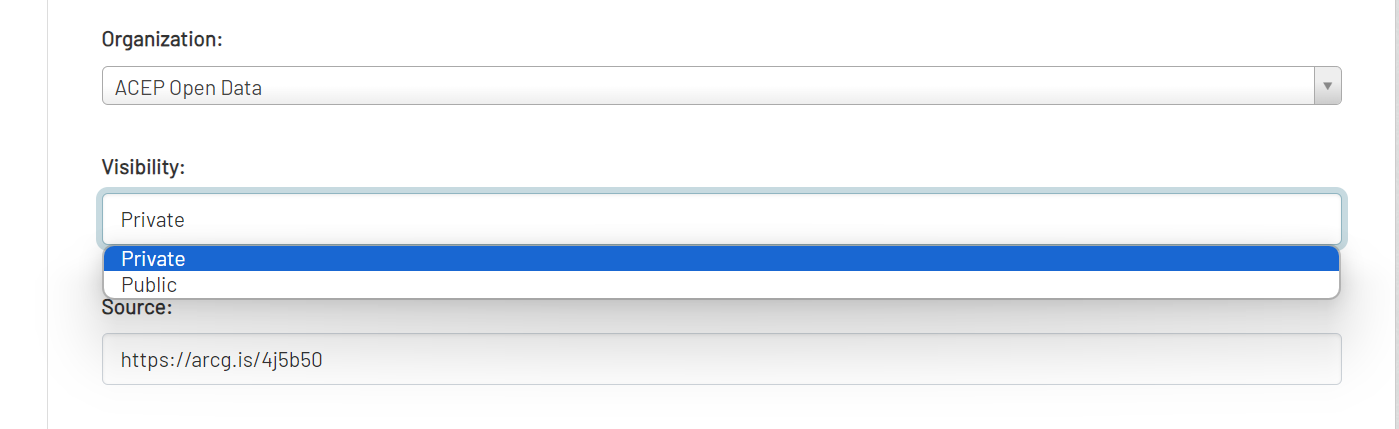
- Change the Visibility field from Private to Public, and click the Update Dataset button at the bottom of the form.
Deleting Datasets/Groups/Organizations
- To delete a dataset, group, or organization, navigate to it’s page and click the Manage button in the upper right.
- Click the Delete button at the bottom of the form to delete.
- Deleting a dataset, group, or organization does not remove it from the database. After deleting, a sysadmin can restore the item or purge it to remove it from the database. If not purged, the url for the deleted item cannot be reused.
Purge Deleted Datasets/Groups/Organizations
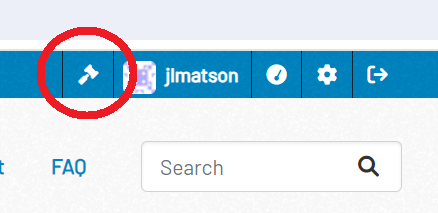
- Navigate to sysadmin settings by clicking the hammer icon at the top of the page.
- Click on the Trash tab. This page will list all the currently deleted datasets, groups, and organizations.
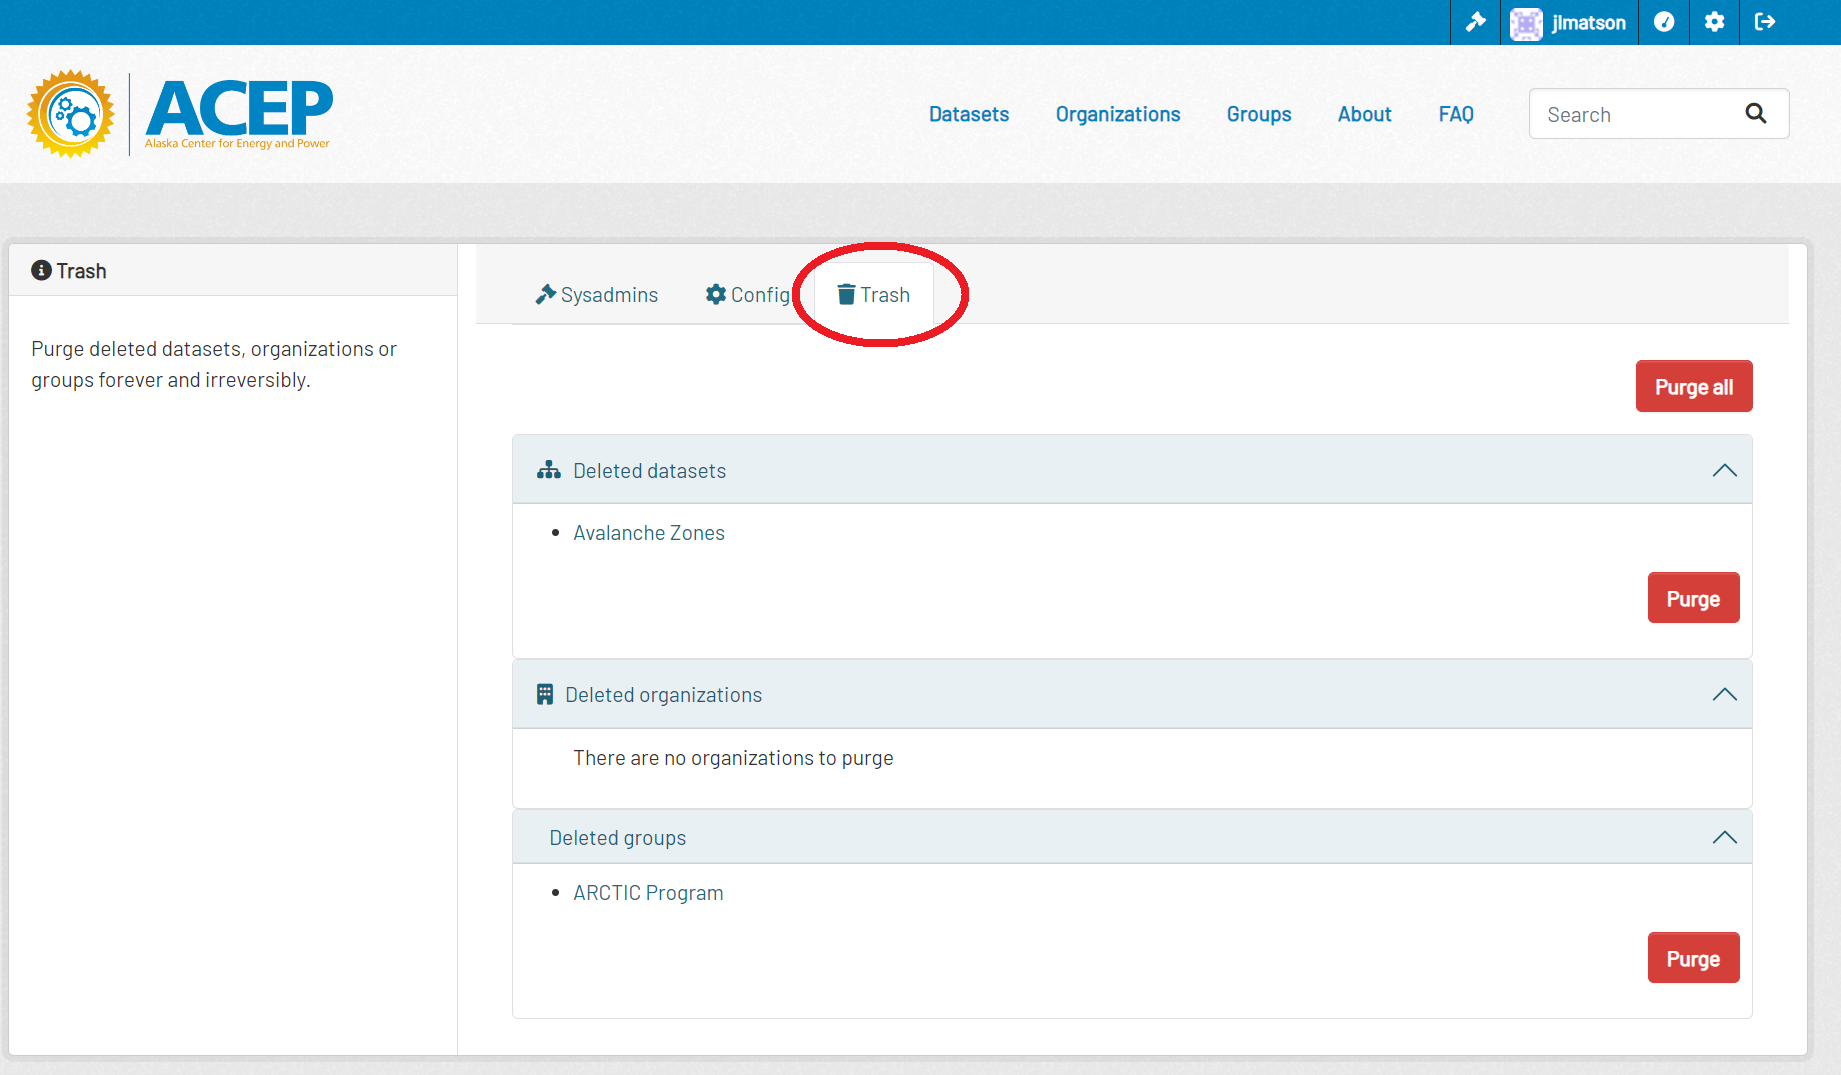
- You can purge all deleted items using the Purge all button at the top of the form. To purge only one group of items (datasets, group, or organizations) use the Purge button in that section.
Restore Deleted Datasets
- Navigate to sysadmin settings by clicking the hammer icon at the top of the page.
- Click on the Trash tab. This page will list all the currently deleted datasets, groups, and organizations.
- Click on the dataset you would like to restore, and click the Manage button in the upper right.
- In the metadata fields find the State field.
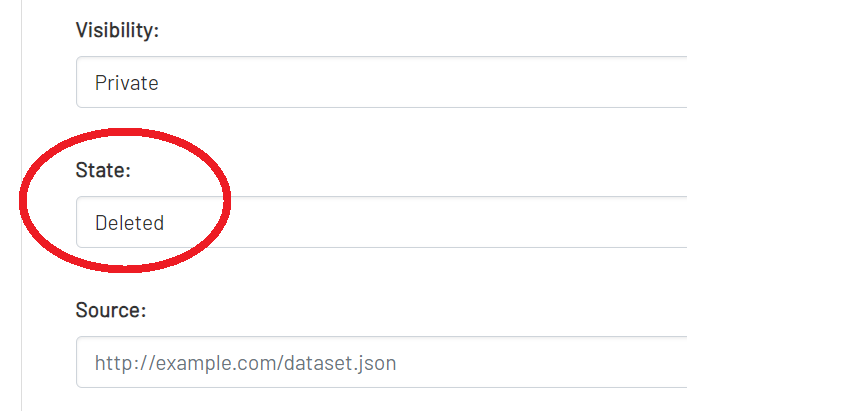
- Change the State field from Deleted to Active, and then click the Update Dataset button at the bottom of the form.
Restoring a Deleted User
When a user is deleted from the website, their information remains in the database with the state field set to deleted. To reactivate the user, you must set this field to active in the database.
- Enter the
acep-db-contdocker containerdocker exec -it acep-db-cont /bin/bash
- Access the postgres database
psql -U postgres
- List all the databases and connect to the ckandb database.
\l\c ckandb
- List all the tables and list the columns of the user table.
\d\d user
- List all the users in the user table.
SELECT * FROM public.user;
- Find the deleted user with the username [username].
SELECT id, name, email, state FROM public.user WHERE name = ‘[username]’;
- Update the user’s state field.
UPDATE public.user SET state = ‘active’ WHERE name = ‘[username]’;
- Find the user again and ensure that the state field is set to active.
SELECT id, name, email, state FROM public.user WHERE name = ‘[username]’;